How to Merge Documents?
How to merge a document?
With the case selected, select the Merge button at the top of the screen. Once selected, the Document categories are available on the left and makes it easy for users to find the document they need to use for the specific case. To make it easier for users to find the correct document, they have a preview of the template on the right side of the screen. Once the user finds the document template they want to use, select the merge button on the bottom of the screen.

The first Category is My favorite documents, this category is per user, and to add documents to your favorites, simply select the star icon next to a document that is used frequently.
Some documents might merge directly without the need to input anymore information. However, some documents are created with different variables, which will require the user to add or select additional information before the merge occurs.
For example, when merging Subpoena documents the user will have the ability to edit or add the Subpoena Type, Deposition Type, Location, etc. before merging the document, so the information added/selected can be included in the merged document.
All fields with a pencil icon can be edited. As seen below:
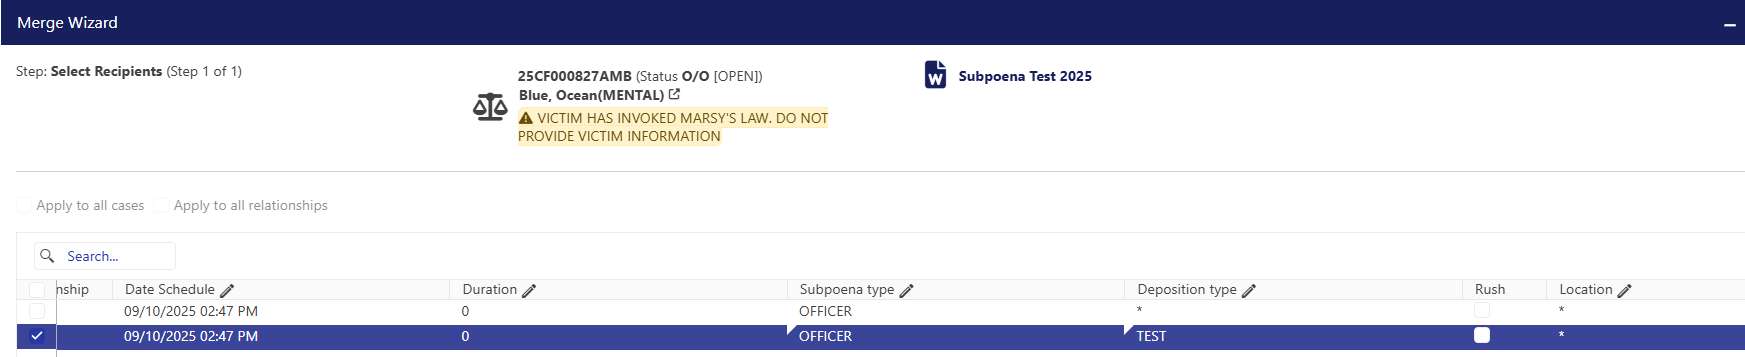
All fields with a pencil icon can be edited. As seen below:
Different Document Types will give users different results because they work differently.
Case Documents
Case Documents when merged yield one document per case.
After the document is merged, it will be available in the My Pending Document Screen. This is where an Attorney or Secretary can keep a document they are working on, until it is ready to be submitted into the case. The user should choose Edit Document and make the appropriate changes. Then, save the changes and close the document. They will need to do this every time they work on the document. This allows them to continue to edit a document over any period of time.

They can flag the document as draft (right click menu) so they do not accidentally submit it before it is complete. Once the document is correct and complete, they can Submit/Approve the document.
Relationship Documents
Relationship documents yield one document per relationship selected, so this adds a new screen so the user can choose the individuals that need a document created. There is also a second check box that allows the document to get emailed to the relationship instead of having to print and mail the documents.
The Directories will need to be set to Default to paperless delivery in the Name Tab of the Directory in order for them to receive the documents through paperless delivery. If the document is being emailed, the directory must have an Email address.
Related Articles
When are the "Apply All Cases/Relationships" checkbox available on Merge?
The "Apply All Cases" and "Apply All Relationships" checkbox are part of the Merge process, however they are not always active or available to be checked. Please check below the rules for each one of them. When will the "Apply All Cases" checkbox be ...What are Merge Document Variables?
Merge Documents Variables Merging documents is one of the most important functions in STAC, and the variables are the engine that powers the merge. There are hundreds of variables available in STAC that list virtually any field stored in the ...What are the different types of Documents?
What are the available Document Types? There are two types of documents: Case and Relationship. Case Documents when merged yield one document per case. Relationship documents yield one document per relationship selected. Letters and subpoenas are ...How to configure the Document Maintenance?
Introduction Merging documents is without a question one of the most powerful functions in the system. Agencies can design and create their own documents pulling data from STAC. There are variables available to retrieve dates, names, charges, ...How to setup E-file?
How to setup STAC to E-file documents? There are several required fields to e-file a document with the FACC. The admin should have the following areas configured: E-file type code table Document configured in the Document Maintenance Image Sub-type ...